In February, I decided to change the layout of the room at home that doubles as my home office and home studio. It was a good decision. Now I just have to work through the consequences.
There isn’t the same amount of space for my amps as there was before. I needed new furniture to put them on. In a world of metric measurements and largely imported furniture, amps and their dinosaur imperial measurements are a very awkward fit. I wasn’t able to find anything in the shops that would suit.
I had to make my own. And, partway through, the pandemic lockdown started.
This one’s a bit of a long read, as much about the story as step-by-step instructions. If you’re interested in making your own, I hope you find it useful!
The Background
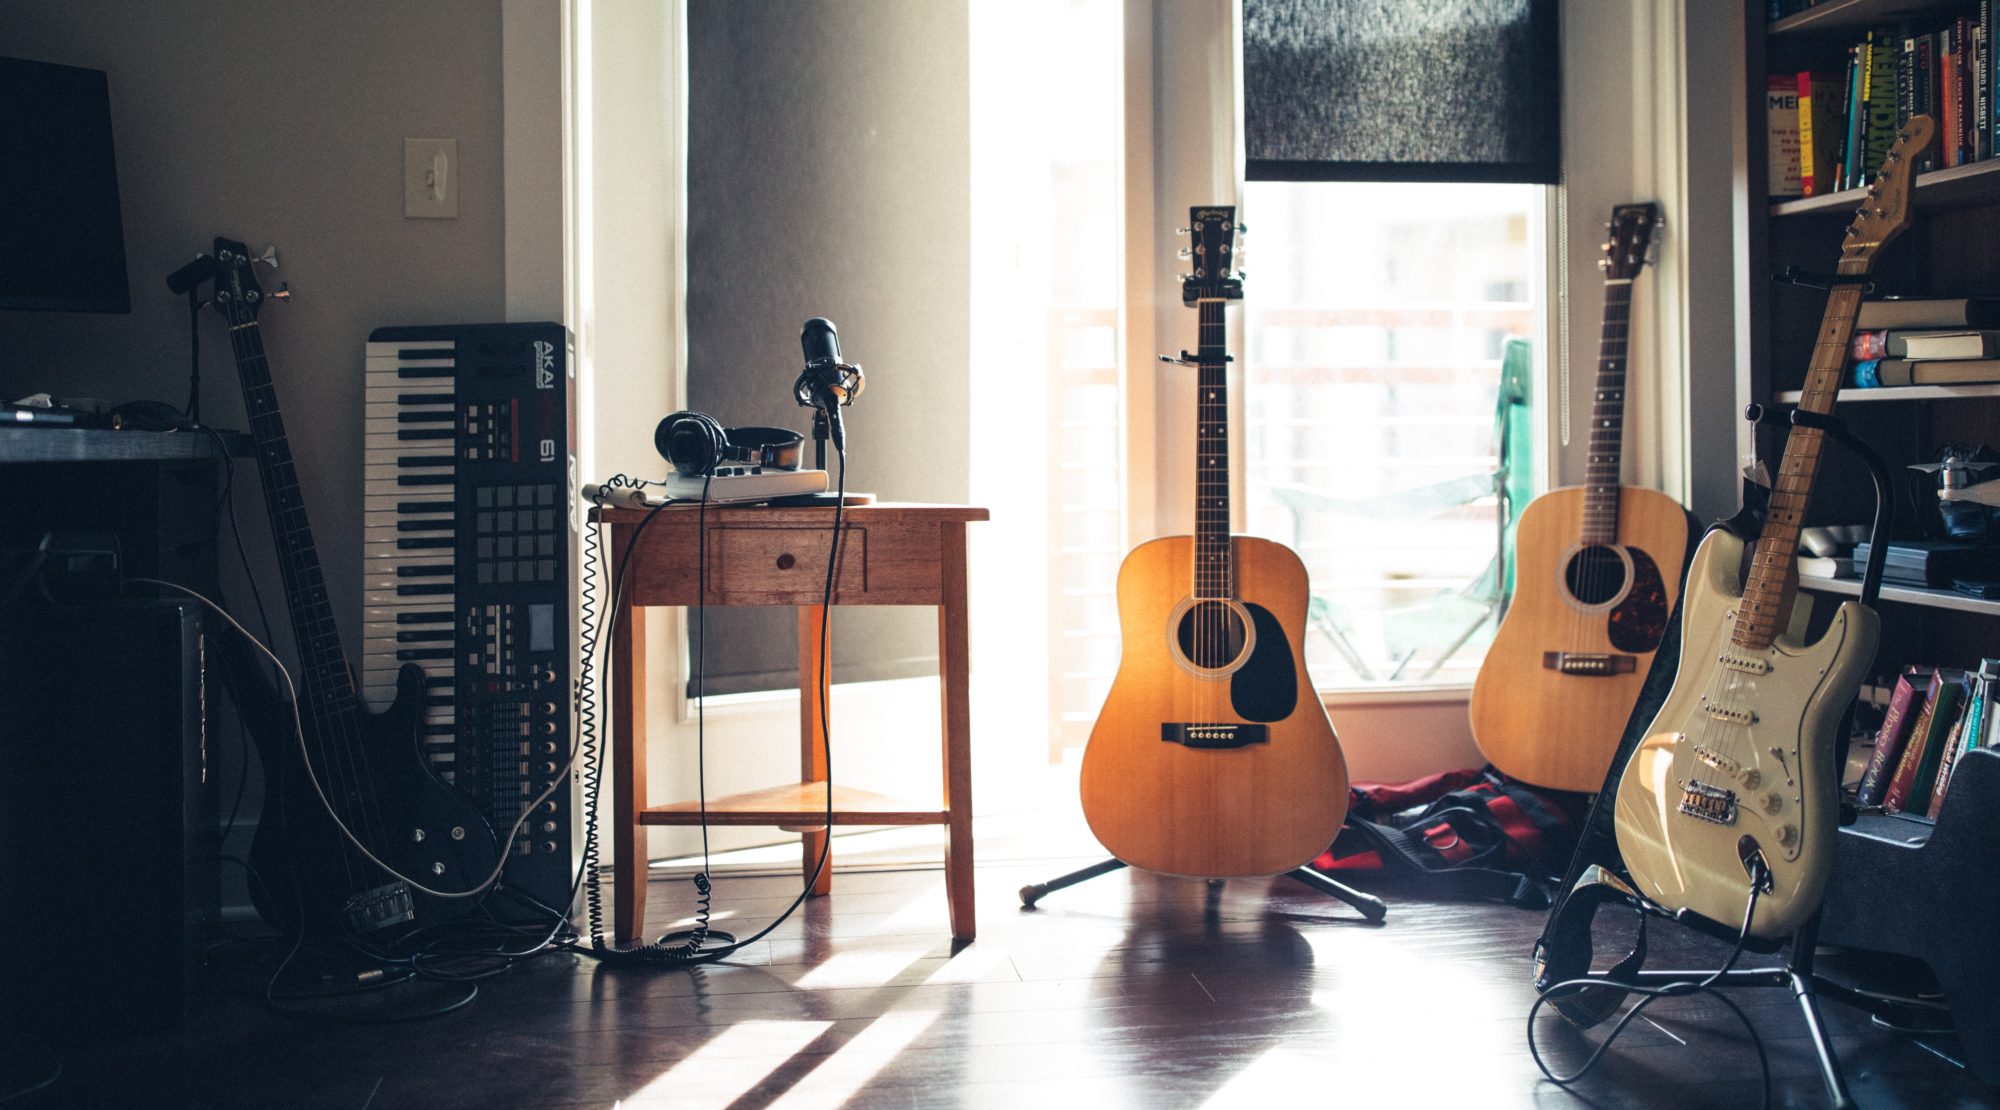
The Hermit’s Cave – my little home studio – is just a spare bedroom in our little terraced house. It’s not a big room; I don’t think I could fit a king-size double bed in here if I tried.
And it’s also my home office.
In February, I decided that the room wasn’t working for me any more. I went out, bought two new desks for the home office, and just piled my amps and cabs up against the remaining spare wall in the room while I figured out what to do with them.
Amps and cabs are funny things. It’s not just the technology in them that’s obsolete. Their dimensions are measured in an obsolete way too (inches).
But modern, ready-made furniture isn’t.
On top of that, even though many amps look boxy, they’re actually quite awkward sizes. Many of them have controls on the top and round the back that I need access to. Those useful carry handles on top also add a deceptive amount of height to them.
I spent several weeks looking into it, but I just couldn’t find any ready-made furniture that would do the job. There was just too big a difference between the dimensions of my amps and the dimensions of the furniture in the shops. If I’d gone down that road, there would have been a lot of empty space, and I would have had to get rid of some of my gear.
Did I take a serious look at having someone make the furniture for me? In all honesty, not really. Truly bespoke furniture comes with a price tag to match. I just didn’t want the furniture to end up costing more than my amps have.
That left make-it-yourself as the only option standing.
Step 1: Initial Planning
The first thing I did was to put together a plan that evolved around three key design constraints:
- What gear I had,
- what space was left in the room for that gear,
- and what DIY skills I had.
The whole point of this project was to fit all of my existing gear into a reduced space. Everything needed a home, and (somehow) that home had to fit in the room. I didn’t want to have to get rid of anything, but there was no way that I could make more space. I had to make the best use of the space that was available.
I put all the dimensions into a spreadsheet: width across, height and depth front-to-back of each amp. From that, two patterns emerged:
- Most of the amps & cabs have a very similar depth. I could make every shelf the same depth now, and be confident that anything new would probably fit on it too. Anything new that wouldn’t fit would probably be too big for the room anyway.
- About half the gear is roughly the same width across. It would make sense for all of that to go onto the same vertical stack of shelving. That would look nicer, and take up the least amount of space.
Looking back at it, I didn’t get the width measurements of all of the amps right. They’ve all got rounded edges, and in a couple of cases I ended up noting down shorter widths than I should have done.
I got away with it, but by luck, not judgement. I went with shelves that were 62 cm wide. If they’d been 65 cm wide, everything would have fit.
If you decide to do a similar build for yourself, I’d recommend going with either 70 cm or 75 cm wide shelves if you can.
Step 2: Design Inspiration
This was the hardest part of all. Right from the beginning, I knew roughly what I wanted, but I didn’t know how to make it. So I did what everyone does these days, and turned to YouTube for ideas.
I knew that I wanted two sets of wooden shelving: one vertical stack to go in the corner next to my studio rack, and two longer benches to go along the remaining wall in the room.
I also knew that I was going to have to use what’s called British Standard Pipe (BSP). You might know it as black piping, or industrial piping. It comes in 1/2″ or 3/4″ widths, and in varying heights.
Why use BSP? I didn’t have the wood-working skills to design and build this shelving using only wood. I also didn’t have any wood-working tools, and didn’t want to inflate the cost of this project by buying more than I had to.
By using BSP for the vertical supports, I’d only need to use wood for the actual horizontal shelves themselves. It was a good decision.
What I couldn’t work out from YouTube alone was how to connect the BSP to the shelves. Oddly enough, it’s an area that most videos (and most articles on the subject) gloss over at best.
As far as I can tell, BSP connects together in one of two ways:
- You can use threaded BSP and screw the pipes into joints.
- Or you can get BSP that bolts into the joints.
For simplicity, I went with the screw approach, and I’m happy with the results.
Step 3: Materials
Wood For The Shelves
There was a time when local DIY stores sold decent pieces of wood. That doesn’t seem to be the case any more. These days, the only place to get wood seems to be timber merchants. Unfortunately, most of the ones around me only sell to the trade.
That got me thinking: what about using recycled wood instead? We’ve got excellent recycling here in Wales, and a lot of the wood being thrown out is old wood from old furniture – the really good stuff. Where does it all go?
I found a place down by the river in Newport called Reseiclo that specialises in reclaiming old wood. What a find! We headed down there in the car, and came back with all the wood that I needed for the project:
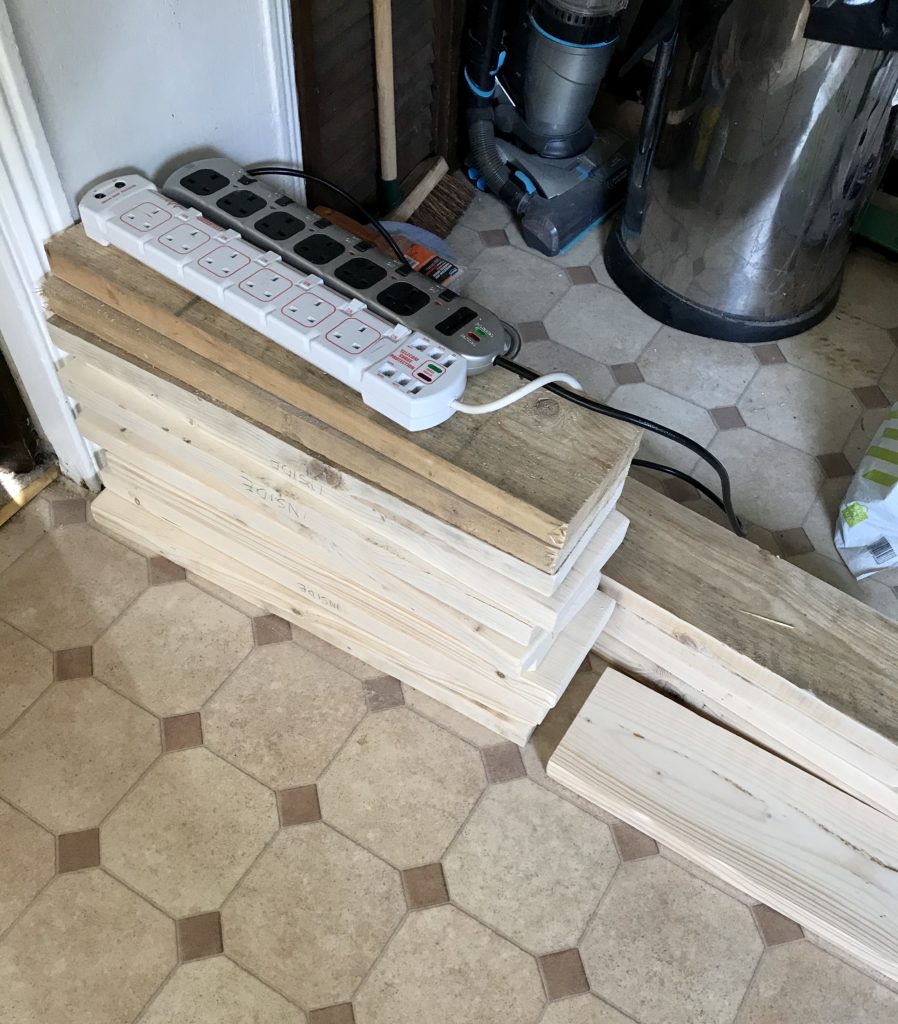
On the day, they had lots of old scaffold boards in, so that’s what I brought back. I ended up with 12 lots of board cut to 62cm in length, and 4 boards cut to 1m in length.
Total price (including for the cuts): less than £18.
The scaffold boards worked out really well. They weren’t what I went looking for, but honestly, I think I’d have to order bespoke cuts of hardwood to do substantially better.
I ended up not using two of the 62cm boards.
British Standard Pipe For The Supports
(We’re jumping ahead chronologically a bit here, but I think it makes sense to group all the materials in one place.)
I found a place in Kent called Threaded Pipe that sells British Standard Pipe and the associated fittings for it. The main reason I went with them wasn’t price. They’ll happily cut the pipe to size (in 5cm increments) and then thread both ends of it for you. That saved me a world of hassle.
I ended up ordering:
- 64 flanges for 3/4″ piping
- 8 lengths of 30cm 3/4″ piping
- 4 lengths of 20cm 3/4″ piping
- 8 lengths of 10cm 3/4″ piping
- 8 lengths of 50cm 3/4″ piping (for the benches)
- 4 lengths of 115cm 3/4″ piping (not a typo!)
Total price: £300.
Looking back at it, I probably could have saved money by going with 1/2″ piping instead of the 3/4″ piping. I wasn’t sure which thickness I needed, so I decided to play it safe. That said, I really like how the 3/4″ piping looks, so I’ve no regrets there.
I didn’t end up using everything I ordered. 8 of the flanges – and those 115cm lengths of piping – were for a third shelf that was going to sit above my studio rack. It was a nice idea in my head, and an utterly rubbish idea in practice.
The British Standard Piping was the single biggest expense of the project. I definitely cut corners elsewhere on the project as a result.
Tools I Bought
(Now we’re really jumping ahead chronologically!)
My original plan was to get the recycled wood cut, planed and sanded down at Reseiclo. Unfortunately, on the day we went down there, most of their machinery was out of use, so they were only able to cut the wood for me.
Pro tip: pre-planed, pre-sanded wood will save you many hours of time.
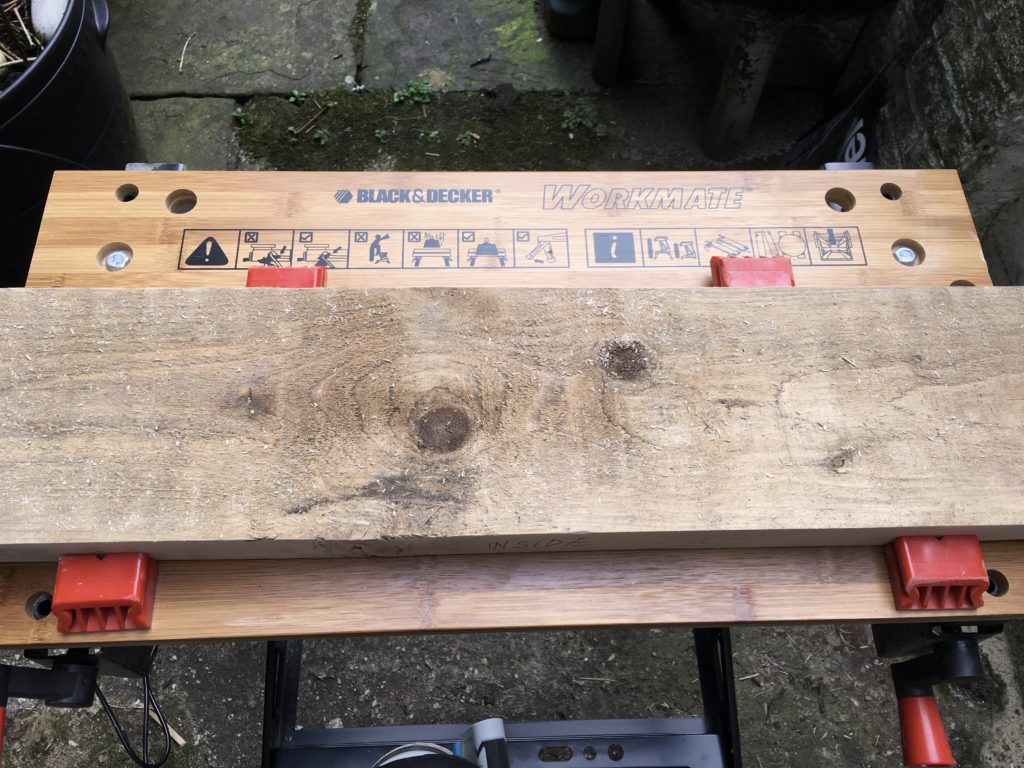
I went out and bought a workbench to work on, an orbital sander to help me dress and shape the wood, and several sets of sandpaper pads for the sander.
Total price: £140.
My local DIY store only had two models of workbench to choose from. I went with the classic Black and Decker workbench, mostly because the store’s own-brand workbench just wasn’t on display. I don’t like buying things sight-unseen.
The orbital sander was an own-brand model from the same local DIY store. I did a bit of research first, and the general consensus seems to be that it’s fine for occasional use, but it won’t last if you use it regularly.
This is an area where buying nothing wasn’t an option, and now I’ve got some tools for the next (first!) time I do some DIY around the house.
Tools I Already Had
We already had a decent hammer drill and set of bits for it.
Tools We Borrowed
A good friend of ours lent us a few tools to help me out. He lent us a pillar drill stand, long drill bits, and a tool for marking where to drill on wood.
The pillar drill stand in particular turned out to be essential for this project.
Screws, Nails and The Like
Unfortunately, I didn’t keep a note of the exact stuff I bought here.
I ended up using two different lengths of wood screw for the shelves. I used about a dozen (roughly) 4″ wood screws to stabilise the wood (more on that below), and a couple of hundred short (roughly 1″) wood screws to screw the BSP flanges into each shelf.
I also used another 128 of the short wood screws to help me fasten the boards together to make 8 individual shelves, along with 32 “flat wrap” steel plates that weren’t part of the original plan. I had to get the flat wrap steel plates during the pandemic lockdown.
Screws are cheap, and as we’ll see later on, you can never have enough of them.
Varnish
I have a childhood memory of amber wooden boards. I’ve no idea where it’s from, but for some reason, it’s an image that’s really stuck in my head, and it’s the look that I wanted for this project.
To get it, I used 750ml of Ronseal Interior Wood Varnish in Antique Pine Matt.
Total price: £19.
I went with a matt finish because I didn’t want the shelves to reflect light on camera. Rightly or wrongly, I was worried that a gloss finish wouldn’t look as good in photos or in videos.
Looking back, I got exactly the colour I wanted, and the shelves definitely don’t reflect light on camera at all. However, the shelves are surprisingly rough to the touch. I probably should have gone with a satin finish, and used a lot more varnish than I did.
Oh, and I bought a brush to do the varnishing with. That cost £4.
Step 4: Drying Out The Wood
We got the wood from Reseiclo at the end of February, just after Storm Dennis had been and gone. It was too wet to work with straight away. Some of it dried out after a couple of weeks. The rest of it took another week or two.
Don’t try working with wet wood, especially with something like an orbital sander. It’s a complete waste of time. Just let it dry out.
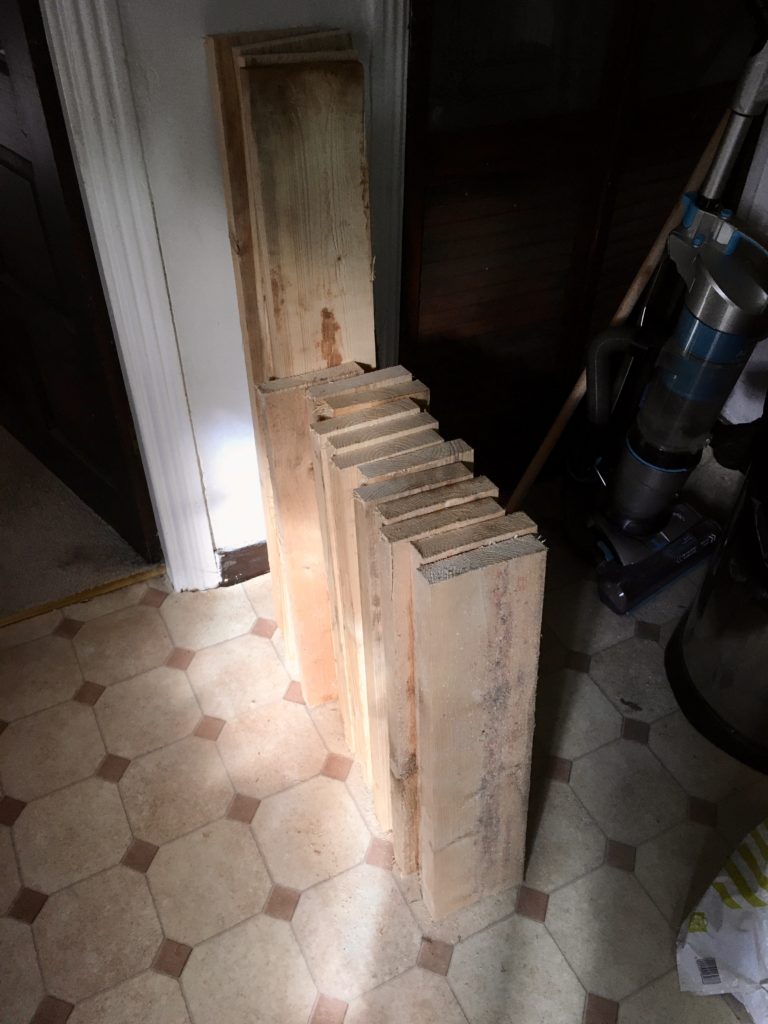
(Sadly, I can’t find a photo of this.) As these old scaffold boards dried out, at least half of them split. The splits ran length-ways along the boards. They varied in length; I think the longest ran for half the entire length of the board.
At the time, I was looking at the pile of wood, and worrying that I’d have to replace it all. In the end, I didn’t have to do that at all. What I had to do was stabilise it, which I’ll cover later on.
Step 5: Sanding The Wood
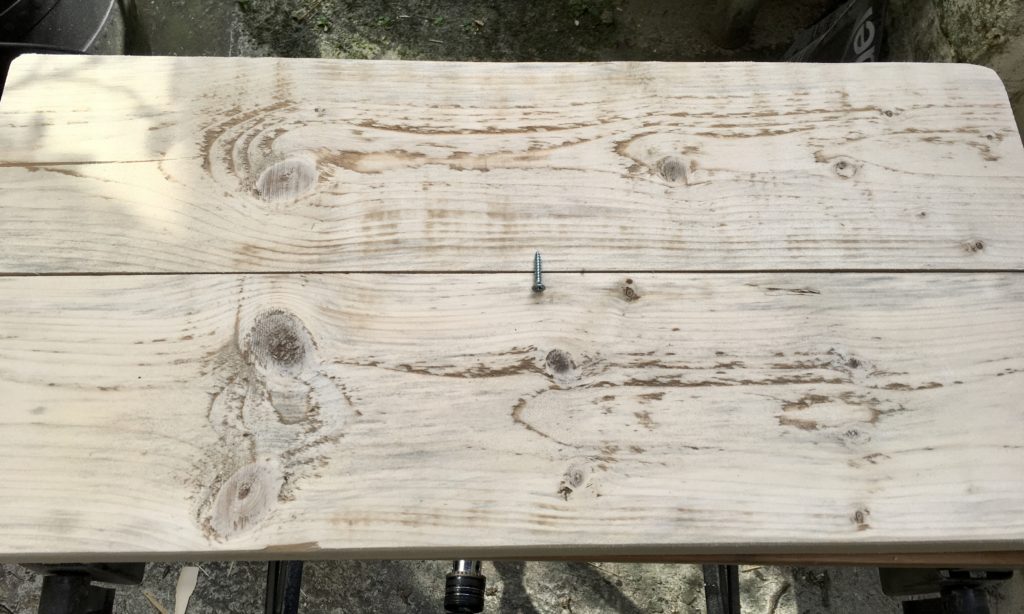
Once the wood was dry, it needed sanding back. This photo shows why:
These scaffold boards might not have cost much, but once they’ve been cleaned up, they don’t look bad at all. Sure, they don’t have the beautiful figuring of hard wood, but they’re not plain and boring either.
To sand the wood, I just chucked each board in turn onto the workbench, and sanded all the surfaces back with 80 grit sandpaper, using the orbital sander.
At the same time, I rounded most of the edges with the sander. My pedalboard’s on one of these shelves. Last thing I want is a sore head or a cut from accidentally banging my head against the edge of any of these shelves.
It also looks nicer too, in my opinion.
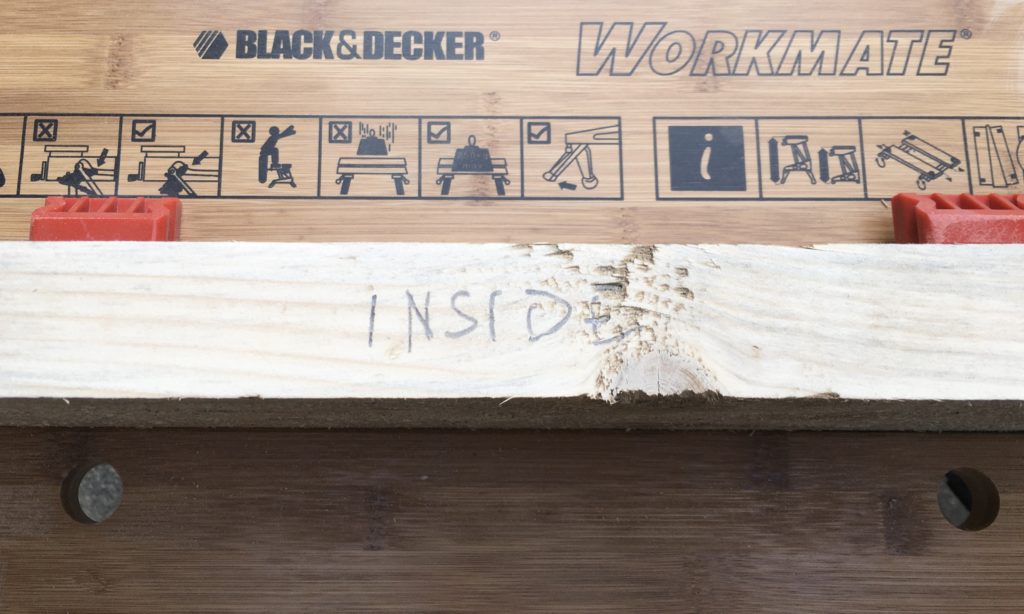
I left one square edge on each board, so that I could join them together later on to make a deeper shelf.
Each board was sanded down with 80 grit paper first, and then sanded smooth with 120 grit paper. I used those two grits mostly because that’s what the local DIY store sold.
Freshly-sanded wood feels pretty smooth with 120 grit paper. Once you’ve cleaned it up and got rid of as much of the sawdust as possible, it feels pretty rough. If I could have gotten 240 grit paper, or something in that range, I would have used that for a third stage of sanding.
Step 6: Stabilising The Wood
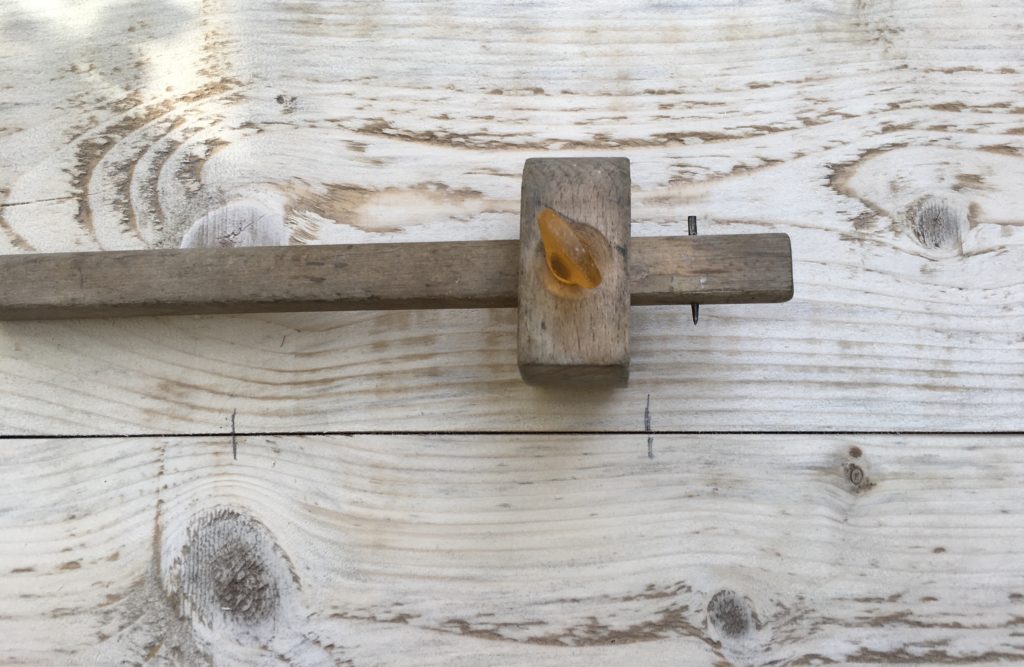
As I mentioned earlier, at least half of the wooden boards had split, and they needed stabilising. This is where the pillar drill holder came in.
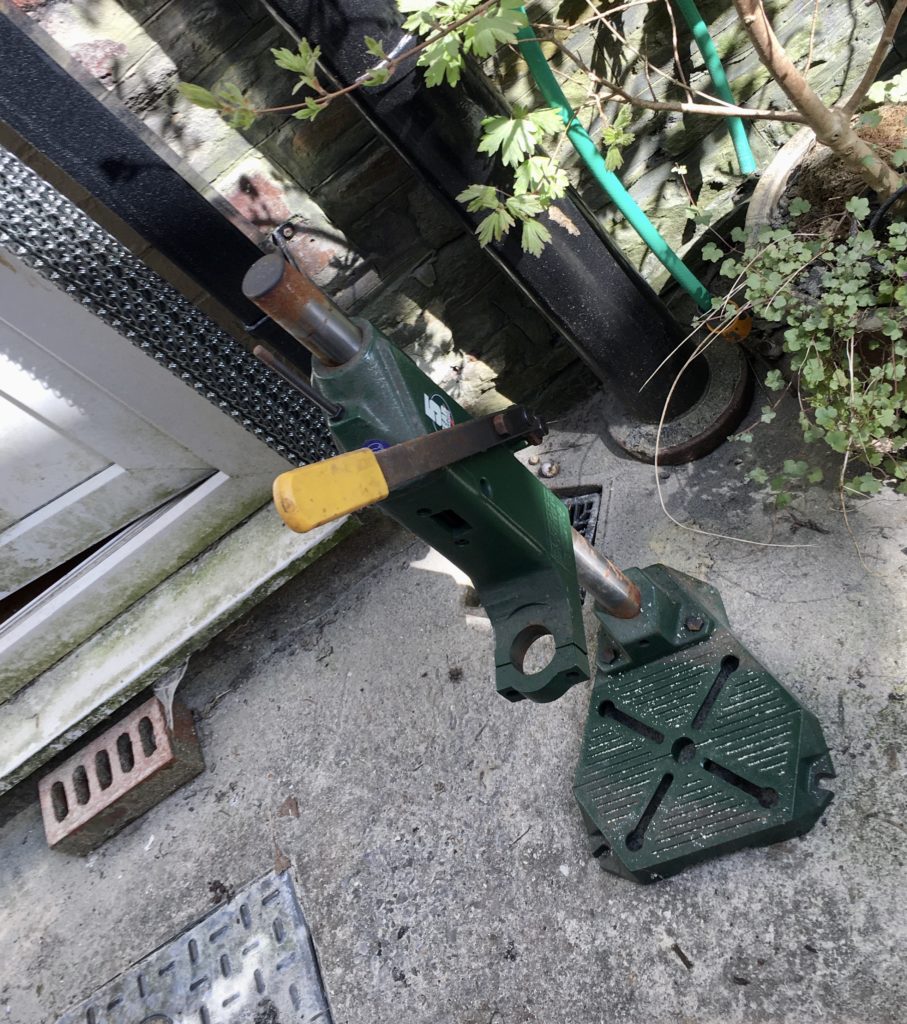
The drill sits in the ring that you can see in the photo above, and then you pull down on the lever to drill down into the piece of wood.
But first, you’ve got to set the pillar to the right height (otherwise the wood won’t physically fit underneath it!) and you’ve got to adjust the catch to prevent the drill going too deeply into the wood and making matters worse.
I don’t know about modern ones, but the one that I borrowed needed two people to adjust and operate. I couldn’t have done that on my own.
After a bit of trial and error, I settled on drilling a thin guide hole into the wood. I’d been told to drill only down to the split, so that’s what I did. I then used the drill as a powered screwdriver to force each long woodscrew down the guide hole and then into the untouched wood on the other side of the split.
I’m very happy with the results:
The photo above shows two scaffold boards that had split whilst drying. In the top one, you can clearly see the split. In the bottom one, you can’t see the split (not at this angle, anyway).
The wood screws pulled both sides of the wood together tightly enough to make most of the splits almost invisible most of the time.
Step 7: Joining The Wood To Make Deeper Shelves
I’ve never joined planks of wood together before. It’s not the easiest thing in the world to do, especially without access to some proper tools for the job.
Our mate who lent me the pillar drill tower suggested one method of doing it, but when the time came, I bottled it and settled on something much more within the limits of my DIY skills.
The Aborted Approach
The original idea was to use short wood screws to join the boards together.
As I understood it, the idea was to screw the shaft of the wood screw into one plank. On the other plank, I was to notch out a hole big enough for the head of the wood screw to fit. The hole was to be offset a bit. Once the two planks were together, a little bit of brute force would have been needed to knock the second plank (the one with the screw head in it) into alignment with the first plank.
If that sounds a bit tricky and involved, with lots of opportunity for error, I’m right there with you.
By now, the UK-wide pandemic lockdown had started. There was no way my mate could pop over and show me how to do it. And, if I got it wrong and wrecked the wood, the whole project would have to go on hold. We didn’t know how long the lockdown was going to last. We didn’t know whether or not community businesses like Receiclo would survive it at all.
It just seemed too risky to proceed that way.
Taking The Easy Way Out
Fortunately, our local DIY store had stayed open. We couldn’t go into the store, but we could order online, and then collect our order from the car park outside the shop. The selection was limited – and seemingly unrelated to what the shop actually stocked – but I was able to get what I needed.
I bought a whole bunch of metal strips to fasten the boards together. I put two strips on top, and another two strips on the bottom. In the photo above, they look a bit ugly, and they certainly standout against the freshly-sanded wood.
On the finished shelf, I barely notice them. And they were almost completely risk-free to fit.
The only risk was running out of screws, which is exactly what happened. Fortunately, Kristi had a stash of wood screws of her own that she was happy to let me use. I couldn’t have finished the project without them.
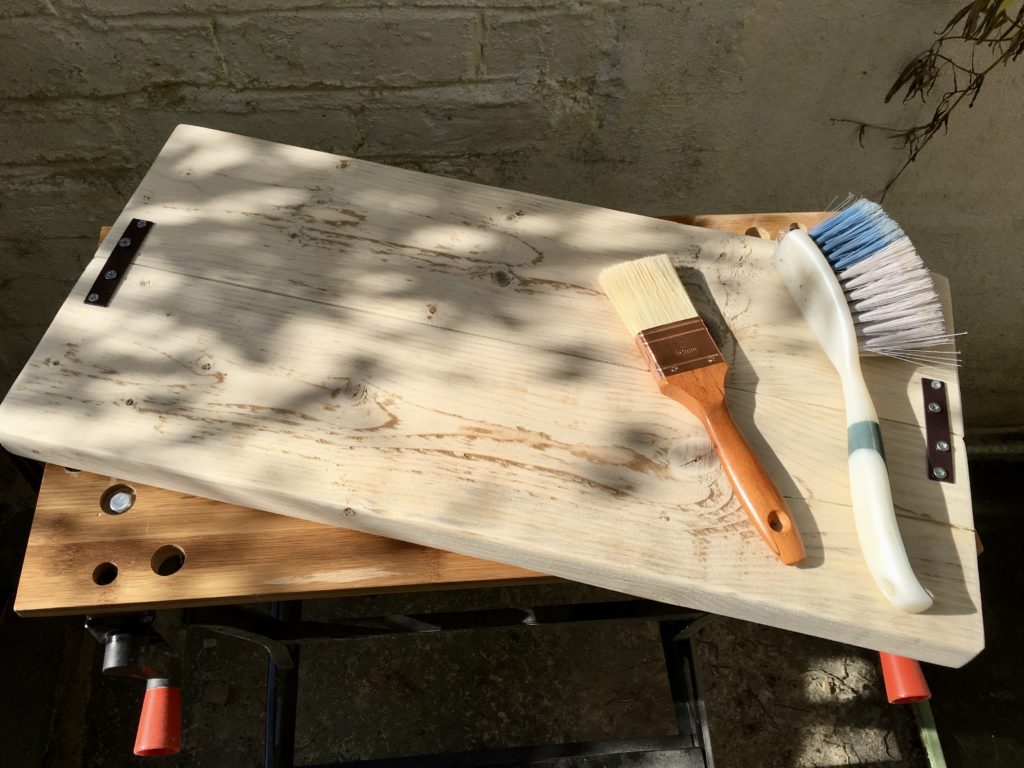
Step 8: Varnishing The Wood
With the boards fastened together, and any last-minute smoothing of the edges done, it was time to get the boards varnished.

Here, I was exceedingly fortunate. Lockdown had coincided with the start of the sunniest spring ever. It was warm (but not yet horribly hot), it was dry, and I was able to work through all of the boards without interruption.

With drying time included, I think it took me a couple of days to get 3-4 coats of varnish onto each of the shelves.
I didn’t have as much varnish as I needed, so the underside of each shelf got a coat or two less than the other surfaces. I was pretty sparing with the varnish too, because I was worried about it running out.
If I was to do this again, I think I’d use twice as much varnish, and I’d do some research to see if it’s a good idea to sand the shelves smooth between coats.
Step 9: Making Mockups!
Once the shelves had dried overnight, they were ready for the black piping.
The first thing I did was to screw the flanges (the things that look like feet) onto the ends of each pipe, and just stack the shelves on top of each other. No screws, just using gravity to hold everything in place.
I did that for the vertical amp shelf, and for the benches that my 1×12 cabs would sit under.
This was a good move.
It meant that I could mock up the final shelving without committing to anything. I could put the amps where they were meant to go, and see whether or not I’d got my measurements right.
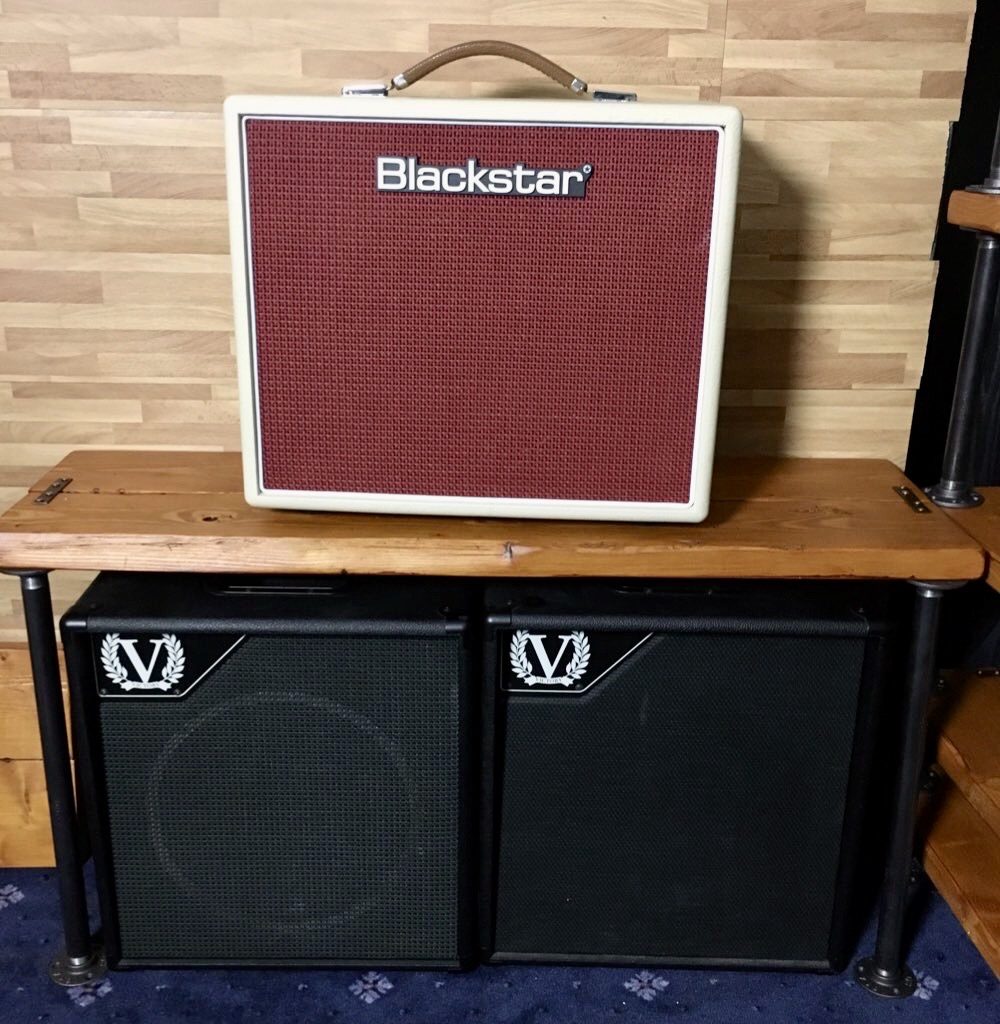
I hadn’t. My Marshall Origin 20H was just too wide to fit on the vertical shelving that I’d planned out. Another centimetre or two of shelving, and it would have fitted.
Fortunately, the Origin 20H fits perfectly next to my Blackstar Studio 10 6L6 on top of one of the two long benches. They’re the two amps that I use the most, and it’s worked out that having them next to each other is really convenient.
I got lucky. My measuring mistake turned out to be a happy accident.
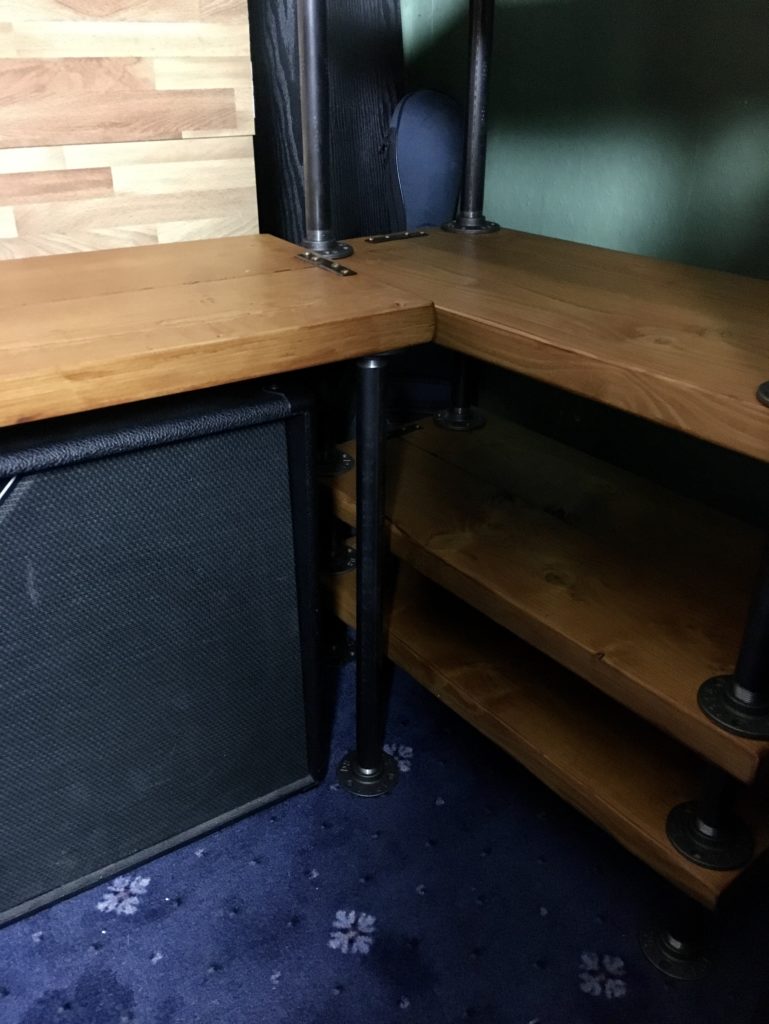
The other thing I was able to do at this point was to make sure that all of the shelving actually fitted in the room.
My original plan was to arrange the shelving in an L shape, similar to what’s shown in the photo above. Can you see the thing I didn’t take into account? I forgot that I’d need the full face of the vertical shelving clear, so that I could access my amps and pedals on there. Doh!
Again, I got lucky. There was just enough space in the room for me to shuffle the vertical shelving along a bit. There’s still a bit of overlap – which you’ll see in a later photo – but it’s only blocking the black piping.
Step 10: Fastening The Shelving Together
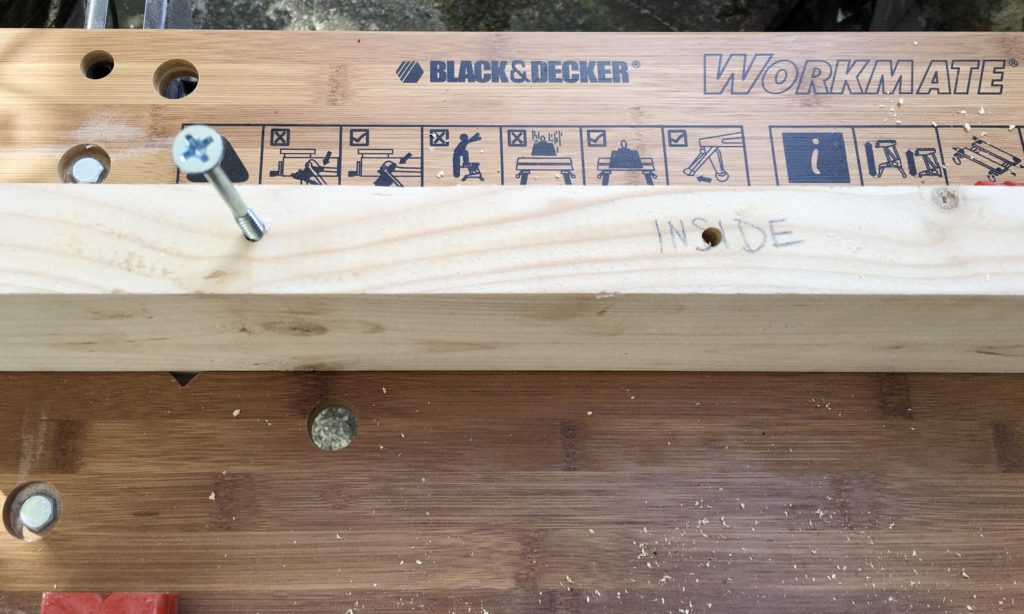
With the mock-ups done – and the order and location of the shelving sorted out – it was time to fasten the black pipe to the shelves.
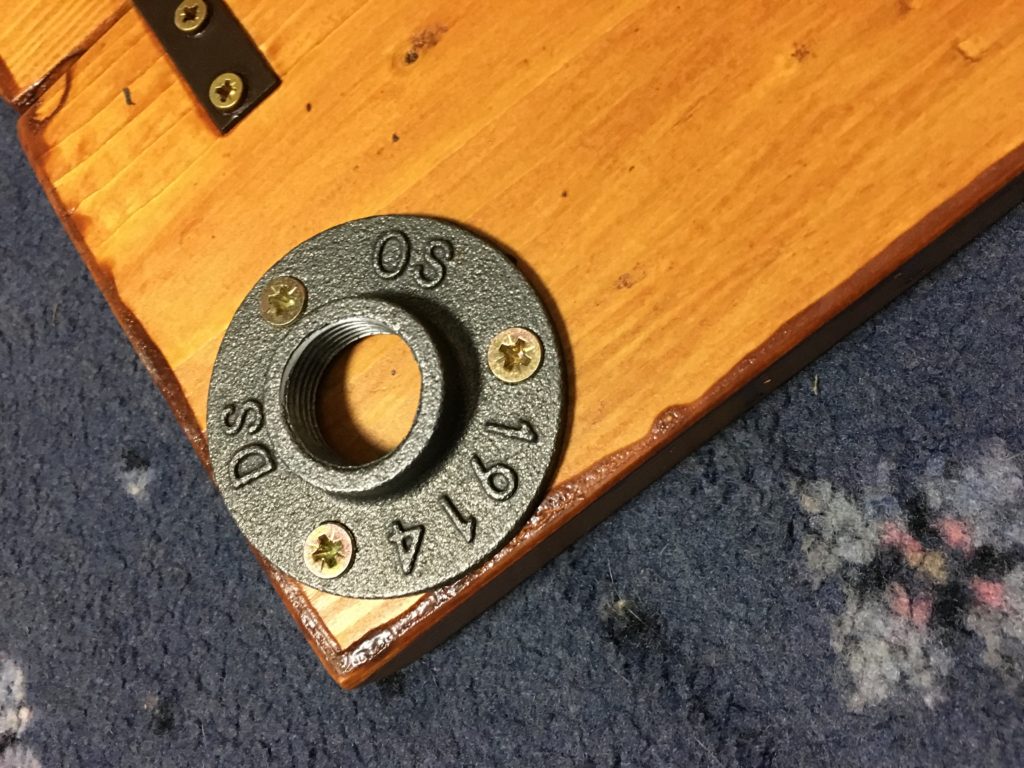
I screwed the flanges onto the underside of each shelf, one flange per corner. Each flange is as close to the edge as I could get it, to maximise the amount of usable space on each shelf.
To give you an idea, the flanges are 7 cm across. When you design your own shelves, add 15 cm to the width of your shelf just for the flanges and black pipe supports.
In the end, I decided not to screw the other flanges (the ones acting as feet) into the top of each shelf.
- I needed to be able to adjust the pipes to get each shelf level. That’ll be harder to do (but not impossible) if the pipes are fixed at both ends at once.
- I’d pretty much run out of wood screws at this point!
- If I need to change the configuration of these shelves in the future, I can just lift them off each other and put them back in a different order.
The bulk of the force through the shelves is downwards rather than horizontal. I’m happy enough to let gravity hold the shelves in place for now.
Step 11: Adding The Ceremonial Rug
Earlier in the year, Celestion was running adverts on Facebook for its impulse response libraries. In some of these adverts, they claimed that one of the reasons their impulses sounded better than the competition was because they had a rug on the floor in the studio they used.
You know what? It might have been said a tongue-in-cheek style, but they were right.
Adding the rug (this is my old one from when I lived in Reading) to the floor really changed the sound in the small room. I wasn’t expecting that at all. The room’s already carpeted. Why would adding a rug on top of a carpet make any difference?
But it has.
The main sources of sound reflections now are the ceiling and the back wall where I hang my guitars. At some point, I’ll fit a cloud to the ceiling to sort that out. Probably. The back wall though? I don’t think I can do anything about that.
And I’m not sure that I want to. I’ve recorded vocals in here in the past, and really liked what this small space did for Tess’s voice. This is a space for me and our music, and I like the idea that some of its character will shape our sound.
That, and let’s not forget just how much iconic music over the decades was recorded in far-from-ideal acoustic situations. I’m not mixing and mastering music for other people. I’m just making our music, for us.
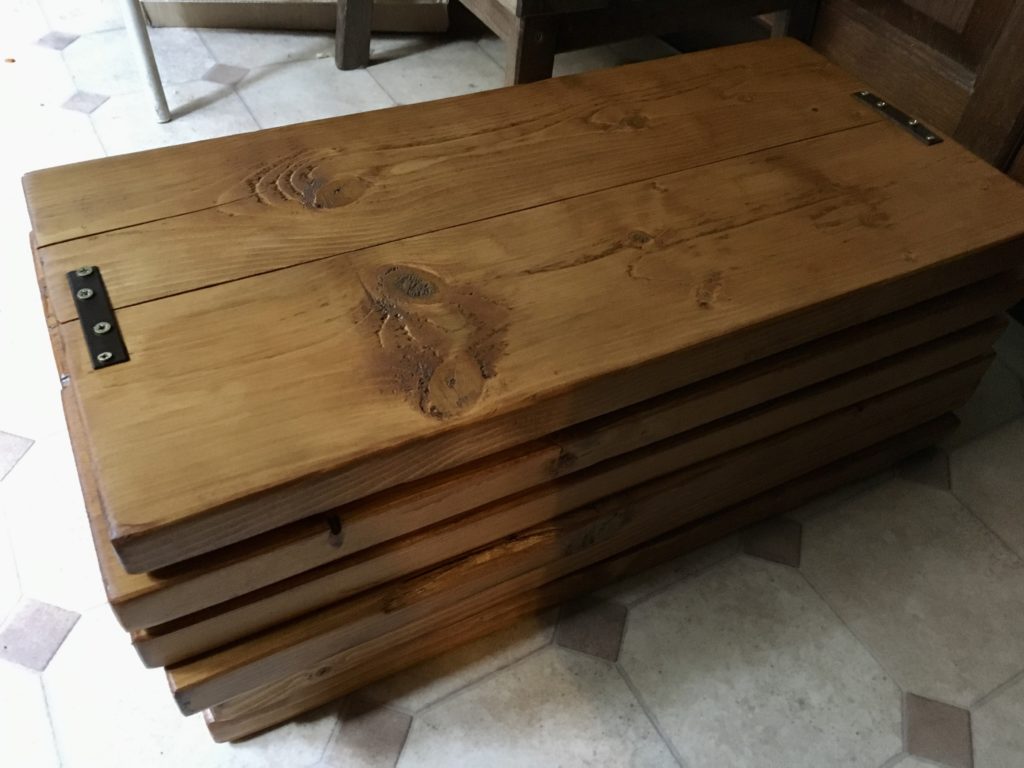
The Finished Item
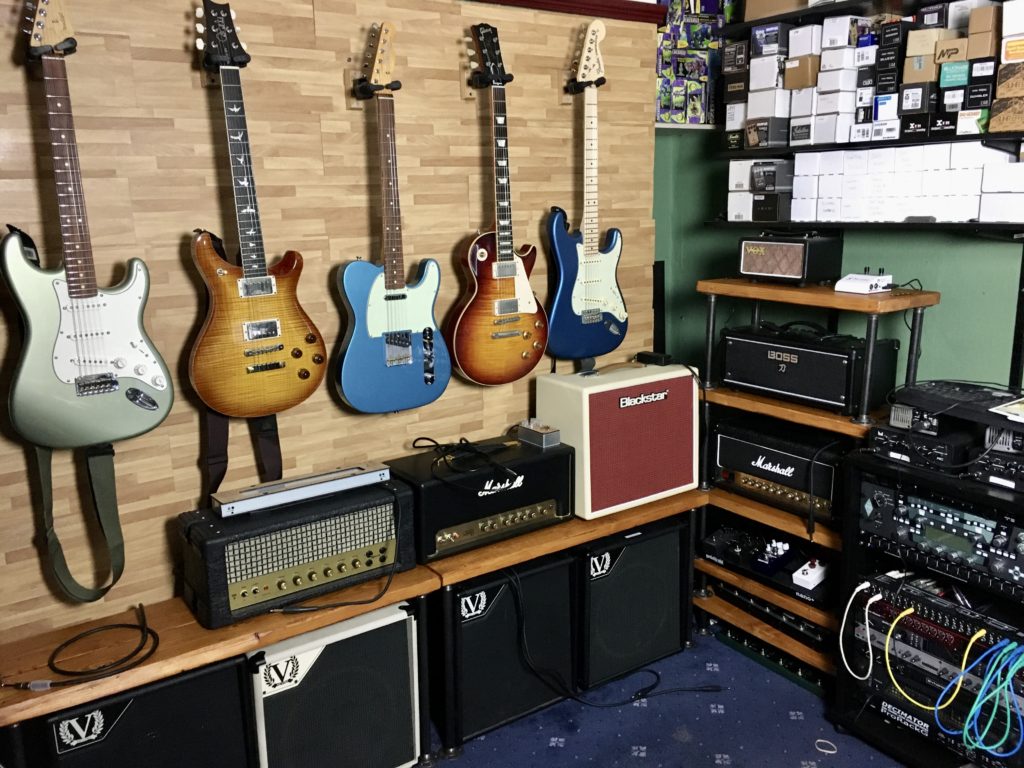
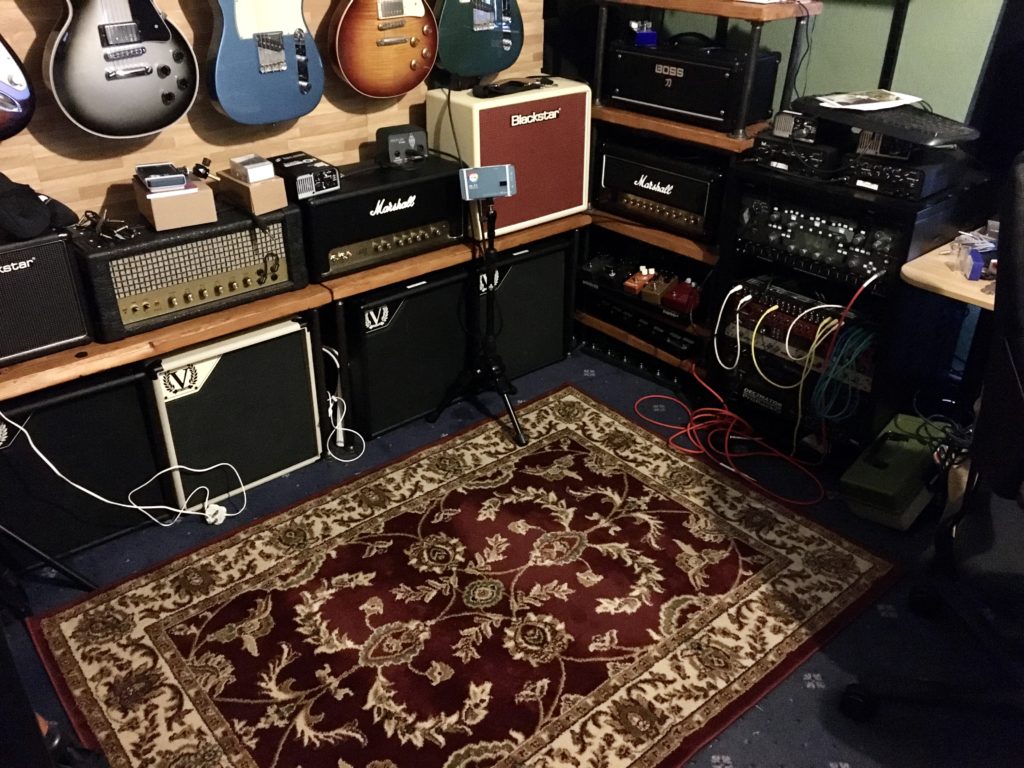
Here’s a shot of the finished furniture, taken before I added the rug 🙂
On the left, you can see the two long benches, with my collection of Victory 1×12 cabs neatly tucked away underneath. On top, there’s plenty of room for several of my amps.
To the right of the benches, you can see the vertical shelving.
At the bottom, I’ve finally got somewhere to my Kemper Remote footswitch when I’m not using it. On the shelf above, my Gigrig G2 sits nicely out of the way. I can pull either of them out and sit them on the floor if I feel the need to.
Right above that, I’ve got my pedal board. I wish it was a little higher, but it’s still pretty convenient. I’m using a Pedaltrain Nano+ board. The power supply, passthru hubs, and a couple of delay and reverb pedals are sat behind it out of the way.
And then I’ve got amps on the rest of the shelves.
That white thing next to the Vox Mini Superbeetle is a Two Notes Torpedo Cab M. It doesn’t live there any more. I’ve now got two of them, and they live on top of my studio rack. Originally, there was going to be a shelf above the studio rack for them, but that’s the one part of my design that I had to scrap.
Final Bill
All-in, this project cost around £360 in materials, and about £140 in tools, give or take.
I spent the equivalent of 6-7 days on making this furniture. Most of that went on the wood. It’s a lot of surface area to sand down. I would have saved at least 3 days if I’d been able to get wood that was ready to varnish.
From start to finish, the project took 7 weeks. Some of that was down to the wood needing to dry out before I could sand it. Lockdown didn’t really add much time to the project, fortunately.
Final Thoughts
There is something deeply satisfying about making your vision a reality. That’s exactly what I’ve pulled off here.
Each piece of my music gear finally has its own place. When I’m not using it, it’s all tidied away. When I want to use it, all I’ve got to do is move a few speaker cables around at most.
Most importantly, I love the feel of this room now. It’s a tiny yet vibrant creative space. Now I just need to put it to work.
One Reply to “Studio Diary #21: Homemade Shelving For My Amps”